Jumping the Shark or Brewing Riker’s Beer?

I’d like to think I’m pretty hip with American cultural references. The fact is, sometimes I have to go look up something in the Urban Dictionary to understand what someone actually meant. Most of these cultural and social terms do not bear repeating. But some of them are hilarious. And let’s face it, if someone at work sees you looking at the Urban Dictionary, you may end up discussing your research with the folks down in HR.

My most recent discovery is the term “Riker’s beard,” with the following excerpt taken from the top definition from Urban Dictionary:

The opposite of jump the shark, i.e. when a TV show goes from unspectacular/boring/outlandish to completely awesome. It references Star Trek: The Next Generation, which was unspectacular until season 2, when Commander Riker grew a beard. The show kicked ass from then on.

Having been around long enough to see the original episode of Happy Days when The Fonz actually jumped the shark pen on waterskies, I can relate. That episode sucked something awful. In fact, that episode was so completely terrible it created the term “jumping the shark.”

I was sitting on my lanai, enjoying the moment and the sunset with a good cigar, while sipping a delicious Burley Oak “Rude Boy” and a stout a friend made, when it hit me how shark jumping and Riker’s beard relate to beer.

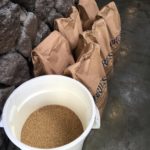
Several small breweries have opened up in the last few years within a 30-minute drive from my home. One of first to open became an instant favorite for me. Not because the beer was great, but because I liked them personally. It’s always nice to know your money is going to people who live near you and have mortgages in your town, vice seeing your money go to a conglomerate in some megacity nowhere near you. This brewery’s beers were, at the time, just so basic and not very interesting in their first year. Nothing terrible mind you, but nothing I would ship to beer-friends on the opposite coast. The tiny brewery grew slowly and steadily for a year or two, just churning out its core beers and getting better with every batch. And then it happened. The owner turned the Brewmaster loose and let him create beers outside of the core lineup.

In those initial two years, the brewery quietly learned and stealthily grew its Riker’s beard. Then I heard a rumbling about a new IPA that had been sampled by friends and their response was pretty enthusiastic. Now, the IPA frenzy has made me a little leery of “over-hype,” so I went to the bar closest to the brewery to try it out for myself. The IPA was an amazing and very refreshing, and thankfully clear (http://www.midwatchbrewingco.com/filter-a-dirty-four-letter-word/) concoction. It was by far the best thing the young brewery had produced. This new-found momentum turned into Brewmaster-series one-off beers and continued success; they have clearly found their mojo.

Beer is exactly like everything else we know. To this small brewery’s yin, there has to be a yang. We all know these breweries – the ones that rest on their early success, cut corners, relax process and quality control or just go crazy. I can think of quite a few good craft breweries purchased by large conglomerates that just destroyed what had been built. Over-production, flooded markets, chasing trends, and most terribly – adding fruit to every damn beer they make. It would seem these breweries were looking for the ramp and the shark pen. I am not saying they cannot grow or progress, but you cannot dazzle discerning beer drinkers with bullshit and gimmicks. It grows old after the first pint. After all, how many watermelon <insert style here> beers can you drink, anyway?

So take a lesson The Fonz never learned: go back to solid writing, awesome character development, and quality production, and the viewers, er, drinkers, will reward you.

Filter – a four-letter word?

Cloudy beer seems to have become vogue these days, what with the giant IPAs that look like orange juice. Don’t get me wrong, I’ve stood in line for hours myself to buy some pretty insanely priced, and insanely delicious, beers of this type. At the risk of alienating some of my good and supremely generous beer friends, this new fad in beer isn’t something I aspire to recreate in my own brewing.

To filter or not to filter

filter media ready for insertion

New filter media

We’ve heard arguments supporting both sides of filtering. Pro-filter brewers view filtering as the hallmark of good craftsmanship and think it proves they care about what they sell to customers. Anti-filter brewers insist that filtering can remove flavor and aroma components. I argue that both sides of this debate have merit and that a middle ground exists for homebrewers and professional brewers alike.


Filtering in the garage

Those of us who homebrew can either “filter” with fining agents, such as gelatin, or by conditioning the beer longer, allowing it to clear naturally through temperature and good old gravity. It’s not like I have a filter setup, so I let my beer sit in secondary fermentation for 1-4 weeks and am rewarded with a reasonably clear beer that gets transferred to the keg. If I then cold condition the beer at 33-35°F for another couple of weeks, the beer clears even further. Neither of these approaches are financially viable for the pro brewers in a world where time = money.

Inserting the media

Inserting the media

Filtering in progress

Filtering

Filter media post-filtration

What it removes

The pros have two choices. Filter or Don’t. Some beers are a no-brainer. Hefeweizen, Wits, wheat beers, saisons, etc. are all cloudy by nature, so filtering isn’t necessary and may in fact change the character of the beer. Lagers, IPAs, pale ales and other ale styles can definitely benefit from filtering. But some drawbacks and other matters have to be taken into consideration when filtering. The filter medium can obviously take out things like yeast, remaining trub and even the proteins that form chill haze. Those are all good things to remove, but you can also remove flavor and aroma character.

So if you want to filter your IPA that all your friends rave about, how could you do it without losing that hop character everyone loves so much? I listened to homebrew royalty talk about filtering recently, and he answered the dilemma of removing hop character with three simple words. “Add more hops.” Brew your IPA, filter it and compare to the original non-filtered version, then adjust your recipe.

Filtering beyond the garage set-up

Outside of the garage, filtering is a little more precise. In my internship at a small brew pub, I recently got the chance to participate in the filtering of three different beers in the same day. The machine is basically a series of plates where the beer flows through an orifice on one plate, through the filter media, and then out another orifice on the next plate. The plates alternate back and forth and the beer is moving through more than 20 of the plates on this particular filter.

Once the brewers have inserted the filtering media between the plates of the filter machine, they compress the plates until they are just barely touching each other. Then, they spray the filtering plates and media with fresh water to allow for expansion, and pump cold fresh water through the filter to facilitate even more expansion. The filter is compressed again to slow the leaking between the plates. This hydrate-compress process is repeated until the filter is completely hydrated and the leak rate is minimal. Finally, before the beer goes through, the filter is sanitized with sanitizer or boiling water. On this particular day, I watched more than 100 gallons of boiling water go through the filter to sanitize it. As a side note, wearing gloves while handling the hoses after 100 gallons of boiling water have gone through the filter is highly recommended. At last, using CO2 pressure, we pushed beer through a pump, through the filter, and into the brite tank.

The pump is in the line to help push the beer through the filter because the fermenter is only rated to 15psi working pressure. As the beer starts flowing through the filter media, and the media strips out impurities, the flow of beer out of the filter slows. This is where the pump becomes critical. Once the fermenter is completely empty, we remove and replace the filter media. It is possible to use the filter media a second time if the filter is back-flushed and sanitized a second time.

The reward for filtering is immediately apparent. I watched hazy beer in the sight glass of the “in” side, and clear beer fill the “out” sight glass. I would also be an idiot if I did not mention the beer in the fermenter is already cold (33°F). This is done because any proteins that would form a chill haze will be present and are then filtered out. A well-known brewery that touts its cold-filtered system sounds impressive, when in fact, cold-filtering is the industry standard for breweries that produce 200 barrels a year and those that produce 50 million barrels.

My take

The concept of filtering is a tough one for me personally. I have always taken time to ensure that my beers are as clear as possible before serving or entry into competition. The key point is that this takes time. The “shortcut,” if that’s even the right term, is to actually filter the beer. I guess ultimately this is a matter of personal taste, style and economics. Filtering systems aren’t cheap, and the process isn’t as easy as you would think. Filtering takes time and is incredibly boring. Trust me, I spent eight hours filtering. The payoff is holding a beer up to the light and seeing crystal clear beer.

Much to my wife’s dismay, I see a filtering system being added to my inventory.

Malty McMaltface and the Maltinium Falcon

lt is the heart and soul of beer. Period. So grab a beer, and let’s talk about it.

Other homebrewers and pro brewers might contend that yeast makes beer, and they would be right. Yeast makes beer what it is, but only based on the raw materials present. For example, let’s say you have a pile of very expensive hardwood. An artist or craftsman could take pieces of wood out of the pile and make a violin or carve a beautiful sculpture. I, on the other hand, could probably only make a campfire…that is, if I also had enough gasoline. The point is that the basic building blocks (malt) are the same and the artist and arsonist (Yeast) both make something different from it.

Treatment of malt in both the homebrew and commercial brewery are very similar. The grain comes out of the bag intact and must be “crushed” to expose the inside of the grain to the mash (“strike”) water. When exposed to water in the 144-1600F range, enzymes present in the malt begin to convert starch to sugars that can be consumed by our artist friend, Yeast. However, for this homebrewer, the scale of malt, how it is milled, how it’s moved to the mash tun (where it is steeped in that hot water) and how it is hydrated in a commercial brewery was an eye-opener.   

Freshly ground grain goes into the sieves

Freshly ground grain goes into the sieves

First of all, the milling process was much, much bigger. On the homebrew level, most grain mills are either powered by a hand crank or turned with a 3/8 – 1/2” electric drill. Even at a relatively small brewery like the one where I am volunteering, a giant AC motor turns the mill. At the homebrew level, a big beer (think Russian Imperial Stout or Barley Wine) might use 16-20 pounds of grain for a five-gallon batch. On the commercial level of seven barrels (about 217 gallons) even a relatively small ABV beer uses 375-400 pounds of grain.

To start the milling process, we do a crush test on about 6-8 pounds of grain to see if the mill is performing the way it should. The test grain is captured in a bin and a portion removed and weighed. Once we weigh it, we put the grain in a giant, five-layer, multi-screen sieve, where it’s mechanically – and violently – shaken for a minute or two. We take the sieve apart and weigh the contents of each layer of the sieve, with particular interest in the “course grit” and “fine grit” layers. If these two comprise at least 80% of the total weight, the mill is working properly and we are ready to brew.

375 pounds of grain awaiting the milling process

Grain awaiting the mill

Next step: start the mill and start the auger. Just like at the homebrew level, the mill is inertia-driven and needs to be moving before you start adding grain. Once we start adding grain to the mill hopper, we can never let it run empty, because the auger is dropping the grain through the hydrator while the hydrator is mixing very hot water (about 100F above the desired mash temperature) with the milled grain. If the grain stops, the mash gets hotter than we want it. Sounds easy enough, but the grain bags weigh 50-55 pounds and the hopper only holds about 25-30 pounds of grain, which means you have no time to open another bag. They must all be prepared and staged right next to the mill ahead of time.

The hydrator where milled grain and hot water meet

The hydrator where milled grain and hot water meet

Something I did not expect about milling and mashing at the commercial level was the strict order to putting grain through the mill. Base malts (80% or more of the total malt bill) go in first and last, with the specialty malts (those to add colors, flavors or character) in the middle. This ensures that base malts are the last malt to pass through the auger, so as not to throw off the next crush test.

While one person puts bag after bag of malt through the mill, the brewer controls the water going into the hydrator, to maintain the desired temperature, while also continuously stirring the mash. Although this doesn’t sound too labor intensive, I assure you it is something to watch. No one who mashes in a mash tun that is not automated (a motor driven mash “rake”) is without blisters and calluses.

The spent grain

The spent grain

Once the mashing is complete, we begin the vorlauf process – recirculating the newly created sugary water (wort) through the mash to further clarify the wort. Since the husks and grain bed make an excellent filter, this part doesn’t take very long. Once the vorlauf is complete, we move the wort to the boil kettle while simultaneously adding hot water from the hot liquor tank (sadly, there is no liquor in the hot liquor tank) to the top of the mash tun to rinse out all of the useable sugar out so that it can be converted to alcohol. When the mash tun is empty, we remove the now “spent grain,” which is then responsibly recycled either into livestock feed or burger and slider rolls for the brewpub. 

My First Day

July 16: I was carrying my water bottle, a bag with two beers from Massachusetts to drink with the brewers at the end of the day and all the excitement of a kid the night before Christmas. The 10-minute walk from my apartment to the brewery felt like a year.

I arrived five minutes early to find Head Brewer Eric already deep into the day’s tasks. Apprentice Brewer Matt started showing me the ropes immediately, and within 10 minutes, even in the cool morning breeze at 7 a.m., I could feel my brand new brewery hat becoming wet with sweat.

So what do you do on your first day as a volunteer at a brewpub in the tropics? Just about everything.

  • First, open up the bar and brewery sliding doors, put out all the chairs and unlock everything for the day.
  • Learn how to use a tri-clamp…and how hard it is…and what it sounds like when you drop it.
  • Start the caustic cleaning cycle in the fermenter that previously contained the jalapeno beer.
  • Repeat said caustic cycle, because the fermenter stills smells like jalapenos. (Note to self: chili pepper oils tend to stick around, so use a designated fermenter).
  • Hot-water rinse the fermenter.
  • Sanitize the fermenter, three times.
  • Build the keg-filling rigs and the yeast rigs.
  • Move kegs, fill kegs, deliver keg (that’s right – I delivered a keg to a bar around the corner – after all, I did say I wanted to learn everything).
  • Get grain (50 or 55 lb bags), mill grain, learn how to open and how not to open up a grain bag.
  • Clean out mashtun, putting the spent grains in giant rolling trashcans for the local farmers to pick up. Nothing gets wasted, the spent grains are either fed to livestock or made into slider buns by a local bakery.
  • Eat…and realize that I am beginning to get really sore (already, or just, five hours in to the workday).
  • Measure out hops additions…twice, because someone spilled some (someone other than me, thankfully).
  • Squeegee everything, always keeping the water moving toward the drain.
  • “Pack the heat exchanger with caustic” fresh water rinse, sanitize the heat exchanger before transferring beer to the fermenter.
  • Polish three 7-barrel fermenters. Yep, that sucked, but – like a good field day in the Navy –  it has to be done.
  • Split a ½ barrel (15 gallons) into three 1/6 barrels (obviously 5 gallons each)
  • Move hoses and pumps (all day).
  • Clean the grain mill – twice, because I didn’t do it right the first time.
  • Learn that a 7-barrel pitch of Cal Ale costs almost $300, which is why they go five generations with yeast harvested from the fermenters.
  • Clean up after the boil process while transferring the hot wort through the sanitized heat exchanger (boil temp to 70F) and then into the fermenter. (This step is called “knock out”)
  • Get sent home 90 minutes early, because the professionals are pretty sure they almost killed the “volunteer” on his first day.
  • Shower and go back for beers.
  • Revel in surviving the first day

At the end of that first day I had some pretty big takeaways.

  1. Standing on concrete all day is hard on your body, and ridiculously hard on mine. Take Aleve before starting the work day and wear good work boots.
  2. Working in a brewery is hot, damp work. If you are not completely soaked with sweat, you will be with brewery water. Make sure you have good, waterproof work boots.
  3. Even after having my ass kicked all day, you couldn’t tell by the smile on my face. The adrenaline thrill can pretty much get you through anything.

Over our next beer, we will discuss all things grain.

From garage to real working brewery

Like most people who brew for fun, or a living, I think my journey was unique. I was a late bloomer in the home-brewing sense and then went crazy about four batches in. All-grain, stainless, temp-controlled everything, kegerators, brew clubs, competitions, blah, blah blah. I basically became completely obsessed and turned my garage, dining room and basement into everything beer related. I have enjoyed some success in competitions, and numerous friends who drink my free beer have told me my beer is great (not the best litmus test based on the word free, mind you).

The shortest distance between two points is: the willingness to work hard.
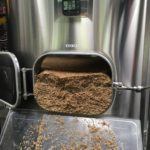
At this point in the homebrew infatuation, who hasn’t thought of quitting their day job and going pro? After five or more beers, just about every serious beer drinker (let alone brewer) with whom I’ve ever had a conversation mutters something along the lines of: “Wouldn’t it be effing cool to own your own brewery?” Well, I’ve asked myself, and my adorable wife, that question many, many times.

So just how do you go from brewing beer in your kitchen or garage to working in a real brewery? I found that two factors affect the outcome here.

  1. You need to have the extra time available to put in a few shifts a week at a brewery.
  2. The Latin adage: Audentes Fortuna Iuvat – “Fortune helps those daring.”

Save the younger among us, there are very few chances to take on a second job for fun. Most of us have family or job commitments that make this impractical or impossible. And those who do need a second job, usually take one that suits their needs, not their dreams. As a guy with life-long “shit for luck,” I lucked out for once. I was afforded the opportunity to take a one-year assignment in Hawaii. I know, tough life for sure, right? There were a few catches to this assignment. I was going to be working on all new projects that I knew nothing about, could not take a workday off for 51 weeks, and had to leave my aforementioned adorable wife behind. This meant that I would be living the bachelor life for a year, surviving on ramen and beer, but with plenty of spare time for a second job….so extra time available to put in a few shifts a week at a brewery? – check.

Now for finding that brewery.

A week-long business trip to Hawaii about three months before my new job started meant I could scout out the potential breweries in advance. This is how I approached it:

  • At the time I was looking, there were five breweries open or in planning. One was still on paper, so that left four to pursue. (By the way, four months later, there are seven breweries in Hawaii)
  • I contacted the four breweries via email, Facebook, and Twitter to start a discussion, gave my background and discussed my passion for both learning and beer, and offered to work for FREE (which we will discuss later). I thought the internship approach (since I already had a paycheck coming in) would take the pressure off the “hiring process.”
  • Two breweries responded and I started putting together some possible dates to interview.
  • By the time I flew to Hawaii, one brewery owner had not confirmed our appointment, so I was now down to one.
  • I met with the Brewmaster and didn’t give him any BS about what a great a brewer I was. I dropped off three of my own beers and three more he would never see in Hawaii (Double IPAs of course). I think we hit it off immediately.
  • During my five-minute “interview,” I reiterated that I wanted to learn ALL the aspects of working in a brewpub — from cleaning kegs and tap lines, to dumping spent grains, to cleaning the kettles, etc.
  • My new boss agreed to take me on as a “volunteer” on the spot. I was to be the brewery’s first volunteer brewer, and so my journey started to reveal itself.

I am starting with one weekend shift each week, which should be about 10-12 hours in duration. I will start at the very bottom, doing the mundane and the dirty, just like everyone else. Although I will be “earning my stripes,” I have still set goals. The first is to put together one beer that I can say I brewed, conditioned, kegged, and served all by myself in 50 weeks. My loftier goal is to brew a collaboration recipe with the pro brewers to be entered into the Great American Beer Festival in the “PRO-AM” category. I have one year to make it all happen.

I will be documenting the journey along the way. It won’t always be pretty, or very fun, but I intend to share how it goes. So lift your glass and wish me luck.

Sea State Schwarzbier

My infatuation with schwarzbier started years ago when in the Navy on my first Mediterranean deployment (“The Med”). Even though it was 1993 and the American craft brew industry was just starting to discover the ability to make beer that did not suck, Europe was (and still is) the obvious master of the European beer styles. I did not get to go to Germany proper, but I did drink every beer I could not pronounce or recognize. Some styles were obvious wins for me, others took years to enjoy (I still don’t like barley wine). I fell in love with the Czech lagers and pilsners, anything from Germany, and even some of the Dutch and Belgian beers. The ones that really stood out on my Rolling Rock-calibrated palate were the rich lagers and anything amber colored or darker.

Sea State

This is what a “heavy” sea state looks like. Sea States are numbered from 0-5, 5 being the roughest.

I know, I know, it is no huge surprise that the Germans brew killer lagers. But what did surprise me was that these dark beers could be so flavorful without any bitterness and without wandering into porter and stout territory. Schwarzbier has remained one of my favorite beer styles, despite its elusiveness in the American commercial market. This was a driving force behind my putting a recipe in motion and trying to figure it out.

Where to start? The first thing to overcome is controlling fermentation temperature. At the time I was putting the plan together, I had only two ways to control temperature. I could wait until the season here in New England was right, so my basement temperature would help keep my fermentation buckets and carboys in the 50-54°F range, or I could use my homebuilt “keezer” (aka kegerator) to get me in the temperature range. Either would be acceptable as I had already brewed several lagers using the “basement method” with reasonable success. The only issue with the basement method, is that the temperature can fluctuate high out of the acceptable range during the early fermentation. This affects the ability to reliably repeat the beer each time, which will obviously affect consistency. So for my schwartzbier, that meant we used the kegerator in order to control the temperature much more accurately.

How to formulate a recipe that would give you what you are looking for? Since I am reasonably new to the brewing hobby, I sought out a few sources. In my opinion, you should find a commercial example that you like. For me, that example was Kostritzer Schwarzbier. Not only was it something that I really love, it was actually German, and listed in the Beer Judge Certification Program (BJCP) guide as a good commercial example of the style (Dark European Lager, category 8B. It was not the top example though; that one was Devils Backbone Schwartz Bier, which is a VA company and also wonderful.) Once you know what you want it to end up tasting like, then you can research the “clones,” blogs, posted recipe resources, etc. I chose to use the example from Jamil Zainasheff’s podcast (The Jamil Show on The Brewing Network), which was based on his award-winning recipe in his book Brewing Classic Styles. I used the BJCP style guides and the malt bill percentages from Jamil’s show and came up with a recipe that finished at the higher end of the BJCP ranges for the style.

On that first brew day, everything went fairly well. I boiled for around 100 minutes to get great clarity and to minimize any dimethyl sulfide (DMS) from the pilsner malt. I then chilled the wort to 60°F and set my kegerator to 50°F (with 2°F variation). I had grown a good two-liter starter for my yeast (WLP830 “German Lager”), so I pitched the yeast in after oxygenating for a full minute. Primary fermentation was mostly completed in 7-10 days, so on the tenth day set the kegerator temperature to 62°F for the diacetyl rest for two additional days. For those not in the know, diacetyl is a mostly lager yeast byproduct that gives beer a “buttery” or butterscotch-like flavor and aroma. Lager yeast can reabsorb it at slightly warmer temperatures (if it was ever produced by the yeast). After this rest was completed, I then set the kegerator temperature to 50°F again and waited an additional two weeks before “crashing” to 36°F for two additional weeks and then transferring to secondary fermentation (aka “secondary”).

After a month in secondary, we carbonated at 13 psi for a week and I kept thinking about how it would turn out. Would it be anywhere close to what I had hoped? After that agonizing week of waiting, we put it on tap and were amazed at how well it turned out. It was clean, crisp, and the malt flavors came through as expected. The slightly roast character, combined with just enough noble hop bitterness, made it really interesting. The 4.8% ABV made it really drinkable, so much so, that we decided to bottle it within a few days so we would not drink it all before we could get it into competition.

We did enter this beer into the Ocean State Homebrew Competition, along with two wild fermented ciders, a smoked, nitro porter (BSP at Sea), and a Kolsch (Kings Bay Kolsch). It was our first competition, so we had the feeling it would be a bit of a bloodbath when it came to the scoring. In fact, it was a bloodbath for four of our five entries, which will be covered in other posts. But this beer did well, really, really well for the first competition.

For the first run of any new recipe, you know there will be adjustments with the grain bill, brewing or fermenting processes, or the packaging of the beer. We definitely took some of those hits with our other entries, but Seastate Schwarzbier scored 39.5 of a possible 50 points, winning the dark German lager category! This victory, while sweet, felt a little hollow as this was the only entry in the category. It was not until many weeks later that we realized that all the German lager categories were combined, so it was the best German lager period, which made us feel much better about that “gold medal.” As a category winner, the beer then competes in the Best of Show (BOS) round for the top spot of the competition. Of the 23 beers competing for BOS, Seastate finished 10th overall (the BOS winner was a 42-point barrel-aged, stout), which was validation that this beer could be moved from the “experimental” to “completed” folders in the brewing software.

Since this beer enjoyed great success the first time, we brewed it again and used the yeast in the fermentation bucket to start the fermentation of a Baltic Porter, which is still fermenting in the new fermentation chamber as we speak. Seastate is a favorite on the taps at our house, and went over well at a recent tailgate, so this one will be in our permanent lineup.


Cask conditioned ales: a “modern” thing?

This post starts like any bad joke you’ve ever heard. “I was sitting in a bar and this guy says, what the hell is that?”

Yep, that’s right, I was sitting in a bar, and I am sure everyone is stunned to hear it. I had just finished a nice American brown ale (Long Trail’s Sick Day) and was looking at the beer this establishment had on cask. It was Left Hand’s Black Jack Porter, and what is better than a good porter on cask or nitro? Not much, so I ordered one. The bartender got to work on the lone beer engine, and the guy two stools down starts in with the whole “modern beer” and “modern beer drinkers” stuff. I mean, it’s not like I am some hipster tool, with a knit hat, neck beard and insufferably smug attitude. I tried to assure the near-octogenarian that this “new-fangled” thing was anything but new.

To be fair to my bar-acquaintance, the beer engine was cool in the US a little while ago, then went out of favor, and is now enjoying a comeback, sort of. I had my first cask ale while in Gibraltar over Christmas in 1993. Although my beer experience was legendary among my own shipmates even then, cask ales were something I had never seen. The couple of ales I tried were truly British, and the names and styles of the ones I tried have faded from memory. What is still perfectly clear, though, are the flavors and mouthfeel of a cask conditioned ale. They felt creamier, a little softer, and really drinkable. I thought it was some “new” technology that us “ugly Americans” had yet to embrace. I could not have been more wrong.

The original beer engine was invented by John Lofting in 1691, some 300+ years before I ever laid eyes on it. The beer engine was created to solve the problem of moving beer from the cellars to the serving rooms. It was invented by that old mother Necessity, and has been around in various forms ever since.

The real beauty of the beer engine is that it requires no power, other than your arm, and it doesn’t require refrigeration. Simply brilliant, and unique to American culture. In the last few years I have really taken note of the unused beer engines in the Irish and British establishments I frequent here in New England. Kind of sad really, but cask ales have a shelf life. If you don’t move them quickly, they degrade. This is a product of the beer engine’s simplicity. It pumps the atmosphere of the bar right into the keg/cask, oxidizing the beer and making it taste “old” very quickly.

Cask Ale
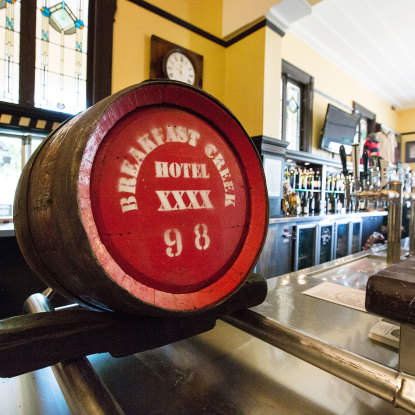
I had another interesting experience with cask conditioned beer on my second trip to Brisbane, Australia. A friend of mine had been there many times, and knew of a place called The Breakfast Creek Hotel (the locals call it the “Brekky Creek”). This place had the best steak house going (the kind where you choose your steak in the case) and the Paddy Fitzgerald Bar, a really cool bar that still serves cask ale. The beer was XXXX Bitter (spoken “four-ex”),made by Castlemain Perkins in Brisbane, Australia. On its own merit, XXXX Bitter is a good beer, a kind of English bitter hybridized with a Czechoslovakian lager yeast. It is great, 4.6% ABV, and crushable. The XXXX Bitter on cask at the Brekky Creek is from another world. There is something amazing that happens in the cask. I don’t know if it is the brewers pitch, the wood, the tradition, or the specter of seeing it tapped with a hammer…but it is amazingly different. I have consumed many, many pints of XXXX Bitter, “off the wood” as the barman says, while at the Brekky Creek and they were all amazing. The cask mellows all the flavors a bit. The bittering from the hops is toned down, and the wood adds a different mouthfeel than you would get from a bottle of standard CO2 draught. The differences to most people would be significant enough to suggest the cask and non-cask versions of the same beer were actually two different beers. As a really cool side note to the Paddy Fitzgerald Bar fame, I would add that they have a very interesting tradition regarding a tapped cask. They finish it that day. Don’t get me wrong, they are small casks (10 gallons/38 liters I believe), but those of you sitting in the bar within an hour of closing could get a special treat. The last time I was there, in 2006, I happened to be there with only four other patrons ­– two locals and three of us Sailors. The locals kindly accepted the free pitcher that the barman poured for them and took a while to consume it. My friends and I went through pitcher after pitcher of wonderful beer while discussing such lofty topics as US football vs. Rugby, Rugby Union, and Australian Rules. We also debated who had consumed more, and which of us had the largest bladder (Big Head Todd drank way more, and I had the largest bladder).

These two great experiences with cask conditioned ale whetted my appetite to try more, and to seek out establishments bold enough to serve it as well. It also made me an ambassador, which is why I am offering the links to the British Campaign for Real Ale (CAMRA) as well as the New England Real Ale Exhibition (NERAX) both of which are a wealth of information.

In this lightning-paced world we now occupy, you can check the ratings of a beer you never heard of in less than 10 seconds on your phone. What you cannot do with your phone, is experience something that takes time, and adds subtlety and complexity over a few weeks, months or years. So wherever you are, take the extra few seconds as you peruse the beer menu to ask you server what is on cask. It will add something to your tasting repertoire, and it just might change the way you look at beer, like it did for me.